Note: Labels are based on Properties and Metadata in Pickit. If you’re not familiar with how to create a property, please review the Property guide before setting up Labels.
1. Open Pickit on the web and switch to Admin Mode. Go to the Media library and navigate to Library Settings → Labels.
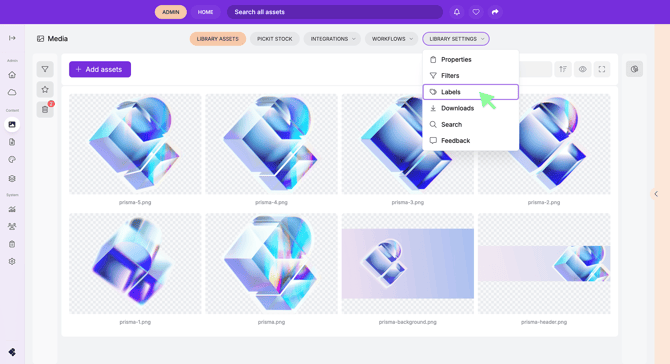
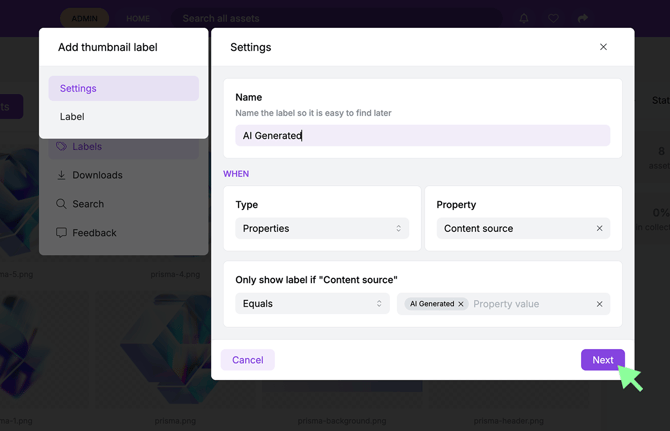
2. Click Add Label and enter the following:
-
Label Name
-
The name of the label (internal reference).
-
Label Type
Choose how the label should be triggered:
-
Metadata – Creates a label based on a file’s metadata.
-
Property – Creates a label based on a property value.
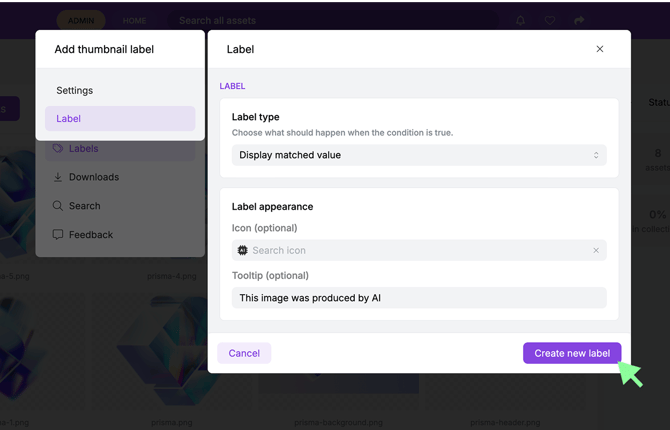
3. Continue to configure how the label should appear:
Label Display Type:
-
Custom Text – You decide what text the label should display.
-
Display Matched Value – The label displays the selected property value automatically.
You can also:
-
Add an icon to the label.
-
Add a short tooltip that appears when hovering over the label.
4. Click Create New Label to save.
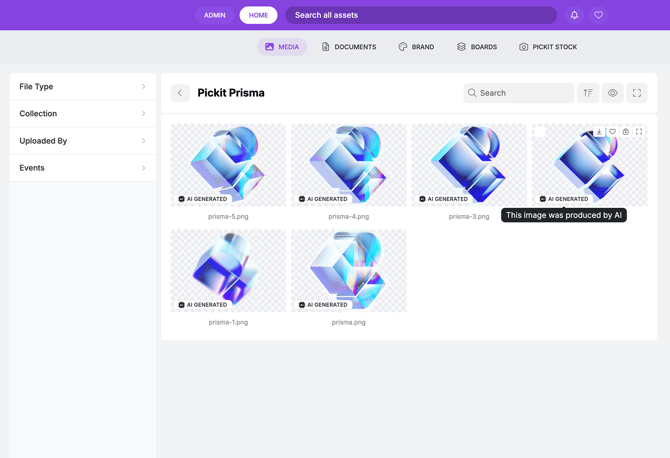
Apply the Label to an Asset
To make the label appear on an asset:
-
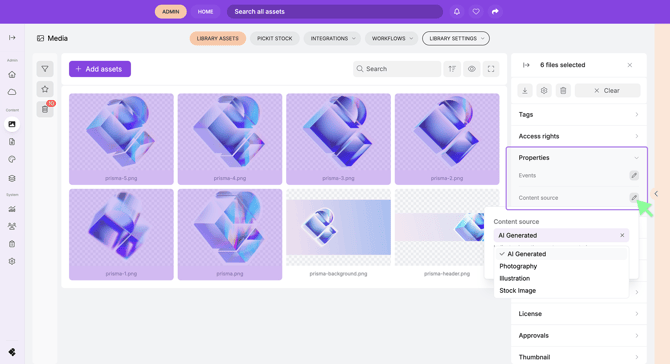
Select the asset.
-
Open Properties in the right-hand panel.
-
Enter or select the property value connected to the label.
Once the correct property value is applied, the label will automatically appear on the asset thumbnail.